|
Download a printable PDF file of this manual (1.9 MB)
Requires Adobe Acrobat Reader
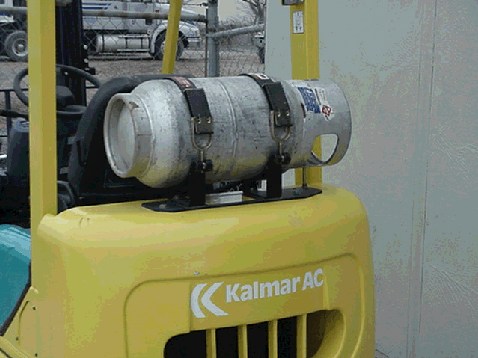
Object of this manual is to convert a Kalmar 3500 lb fork lift that runs on Propane to run on Compressed Natural Gas.
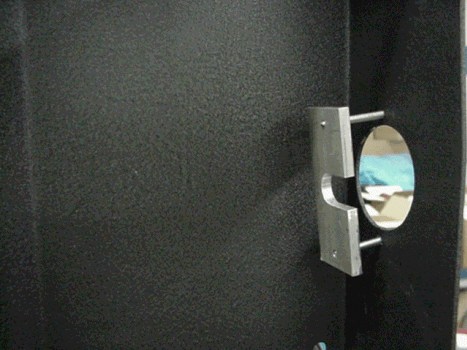
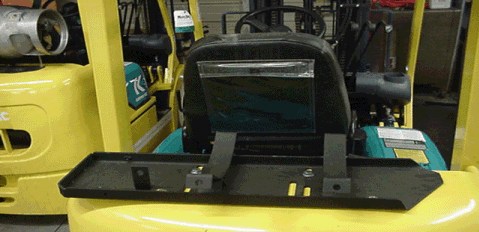
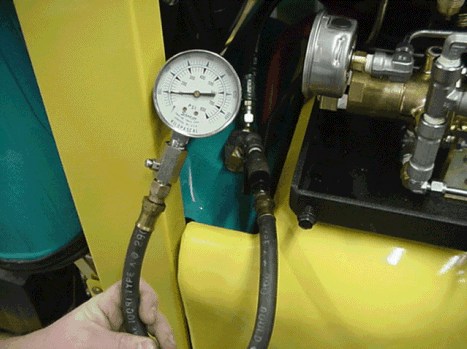
Picture 1
- Make gauge clamp to support gauge to cover (Picture 1).
- Re-tap all holes in mounting plate to clear powder coat from threads.
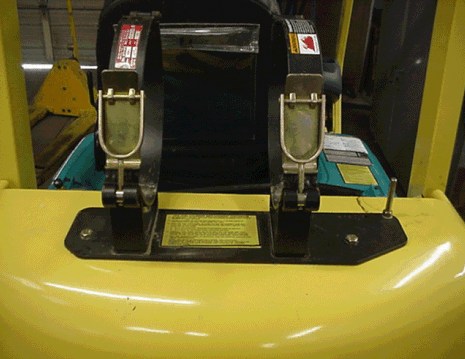
Picture 3
- Remove propane bottle mounting bracket. Keep the threw bolts to mount the CNG Bottle (Picture 3).
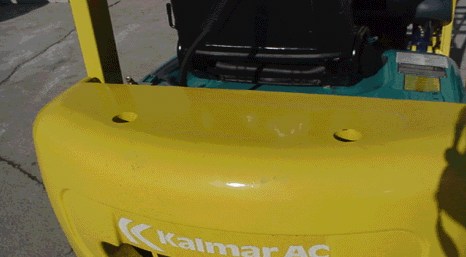
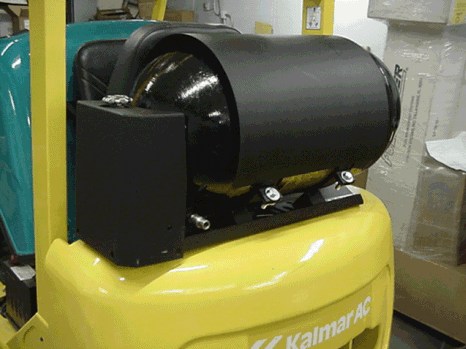
Picture 4
- Mount the CNG Bottle mounting plate using threw bolts and tapping new Ẅ course threads into counter weight (Picture 4).
- Align tank bracket with ridge on counter weight, then align left side of bottle just inside the left roll cage.
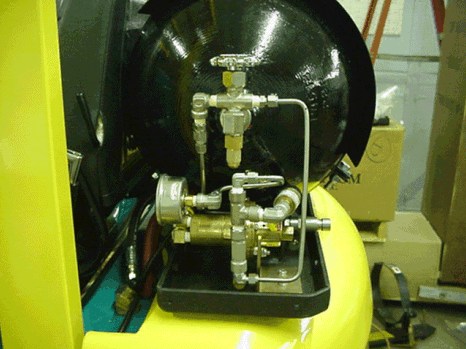
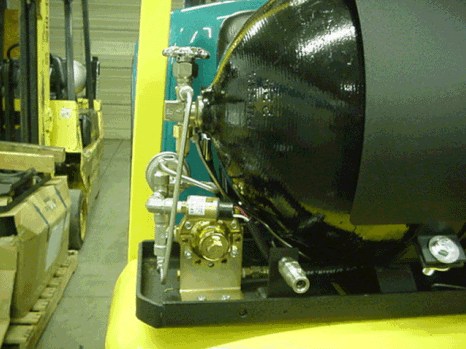
Picture 5
- Install first stage MECO regulator to mounting plate.
- Tube gauge ỳ .035 316 stainless, add 90-degree female fitting to back of gauge.
- Install auto select pressure switch; kick out towards back of lift to clear tank.

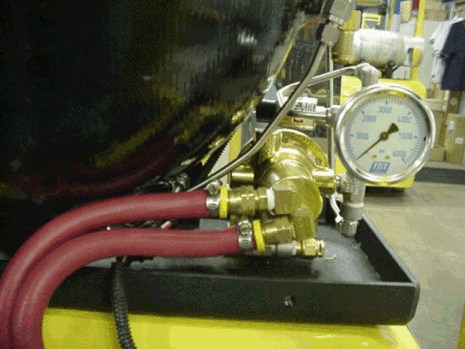
Picture 8
- Install second stage regulator (Picture 8).
- Modify tube between lock off and second stage regulator.
- Re-route hot water line to MECO first stage regulator.
Picture 11
- Drill holes on back of body for hot water line to come through (Picture 11).
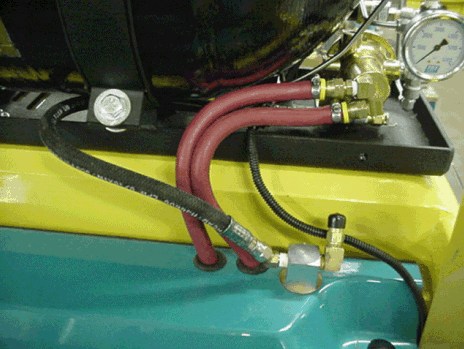
Picture 12
- Connect hot water line to back of first stage regulator (Picture 12).
Picture 13
- Install CNG Bottle; DO NOT MOUNT SOLID YET. You will need to move CNG Bottle to finish tubing (Picture 13).
- Tube from NGV1 fill connector to tank valve with ỳ" tubing.
- Tube from CNG Bottle valve to MECO regulator with ỳ" tubing.
- Tighten tank brackets.
- Route cable from Auto Select pressure switch (Part # EK109) across motor to dash. Extend wires if needed.
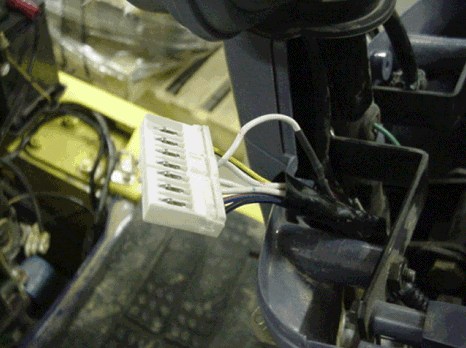
Picture 17
- Using cable from Auto Select pressure switch (Part # EK 109) solder red wire to the # 3 pin on cable harness on right side of dash panel (Picture 17).
- Ground the other wire out of the cable. Low-pressure switch closes when tank pressure is below 500 PSI.
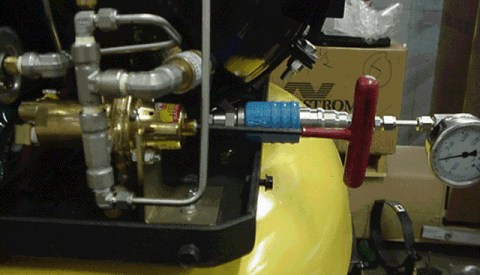
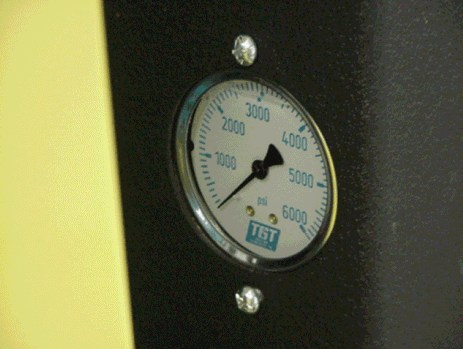
Picture 19a
- Set first stage MECO regulator to 60 PSI. Check Pressure at Schrader valve on bulkhead. (Pictures 19A and 19B)
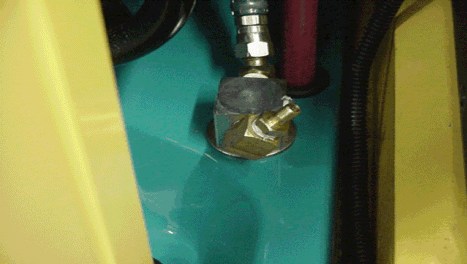
Picture 19b
Picture 20
- Fill lines with tank valve closed and check for leaks.
- Fill tank.
- Start motor and adjust first stage for smooth idle. Also, adjust idle mixture for smooth idle.
- Check power setting on carburetor while engine is running.
- Adjust timing advance as needed, a little increase is usually all it needs.
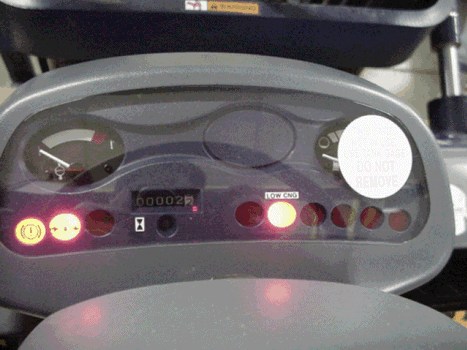
Picture 24
- Start fork lift then close tank valve and check for low CNG light, this light should come on around 500 psi and below. (Picture 24).
Picture 25
- Replace tank valve cover, tighten gauge clamp, this clamp will fork around the gauge stem and pull it up firmly to the cover (Picture 25)
Picture 26
- Mount tank solid with Ẅ" bolts and lock nuts, recheck all nuts for tight
- Install dust cover on NGV-1 connector.
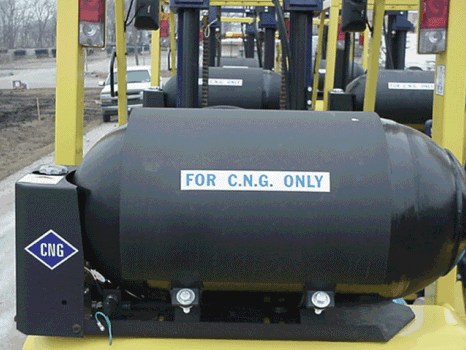
Picture 27
- Install decals to tank valve, CNG Only on tank and Blue CNG diamond on back of tank valve cover.
|